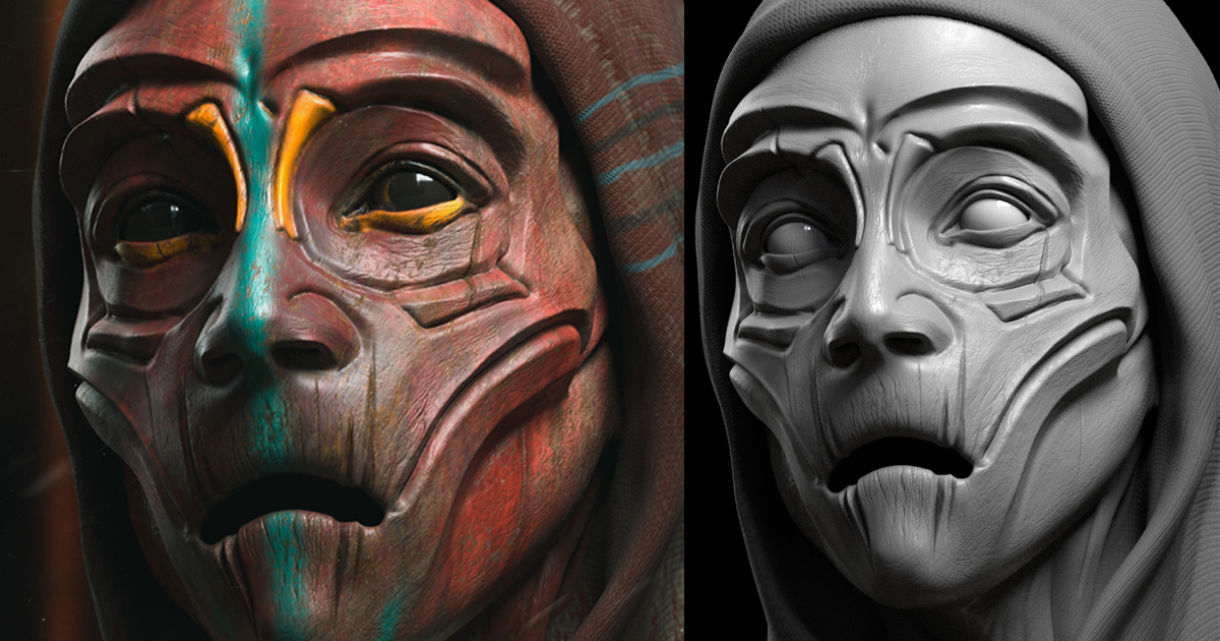
Arturo Ramírez also known as Limkuk talked about his Sad Muse mask design made with ZBrush, Maya, and Substance Painter.
Hello again. My name is Arturo Ramírez, but everybody knows me as Limkuk. I am from the beautiful City of Morelia, located in Mexico. I’ve been working as a creature and character artist for games, movies, and cinemas for 4 years. When I got into 3D for the first time 4 years ago, I was creating cultural posters for the government of Morelia.
Read the first interview with Limkuk here:
Sad Muse: Start of the Project
All my life I really liked the tribal theme, and for me, it’s a thing that you can explore and have millions of results. When I started the Sad Muse I really wanted to create a mask that resembled Virgin Mary’s facial expression and combined both sadness and hopelessness. I drew inspiration from the old sculpts of Mary from the Renaissance.
First, I created a mood board as it helps me to see better what directions I want to take my model to in terms of sculpting, texturing, look dev and final composition.
Sculpt
First of all, I started with the head that had basic proportions.
Then I sculpted the primary shapes of the model using the basic brushes like Standard, DamStandard to create wrinkles and some hard damages, Clay Buildup and Clay to create the face construction, and H polish to create the HardSurface feeling.
For the details, I used a simple alpha that comes with ZBrush and a cloth alpha that I found on the internet and used as a global noise to obtain the fabric pattern.
The biggest challenge here was to find the right facial expression and the final look.
Eyes
The eyes were typically created in ZBrush and only have a simple brown texture with a bit of yellow. The eyeball was made in Maya with aiStandard.
I think that lighting does all the magic here. As Emmanuel “el Chivo” Lubezki said, without light, there is no film.
All the rest is achieved with very simple shading settings. The textures themselves come from Substance Painter. Remember, that if you have a great model your textures need to be as great because in the final piece all the parts will merge.
Textures
The textures themselves come from Substance Painter. For me, it’s a powerful tool to create PBR Textures, and the pipeline can be adjusted to every render settings. The displacement, AO and Cavity maps come from ZBrush while in Substance Painter I created the Diffuse, Roughness and the secondary Normal map.
Remember, that if you have a great model your textures need to be as great because in the final piece all the parts will merge.
Wooden Mask
First I started applying the base material and found the color that I was looking for.
I applied a smart mask that worked with my cavity map to create some nice roughness.
Then I started to create the makeup. This was very important for me and I explored a lot to find good makeup that would make the face look alive.
When I was happy with the result, I continued with the worn out textures: those were simple colors with smart masks. Finally, I achieved the feeling that the mask is very old.
Rendering
For this project, I used Arnold render for Maya 17. It’s very powerful and the shading process is quite fast.
For the lighting, I used an HDRI and a simple LightRig with Keylight, Fill Light and two Rim Lights. I really like to use these settings in order to obtain a Rembrandt lighting setup.
You can learn more about Rembrandt lighting in the video by Jordan P. Anderson:
For this process, I recommend studying a lot of photography and lighting principles to understand how every light works.
The shading was done with the aiStandard. This shader is extremely powerful and I only connect the maps from ZBrush and Substance Painter. The advantage of having PBR textures is that this process is usually faster with the AI Standard Surface. I only used some Ramps to control the roughness maps.
One of the tips I give to my students: study a lot of materials and explore the real world. Walk in the streets and study how the metal, wood, plastic, water, etc. work, how the materials react to different light, reflect and refract it or not. It will help you to get a nice setup for your shaders.

